Introduction to HTML
Learn how to create your first webpage with HTML
CONTENTS
Welcome.
In this interactive course, we’ll learn how to create a simple HTML page with some content and style.
Follow along by reading and doing the exercises.
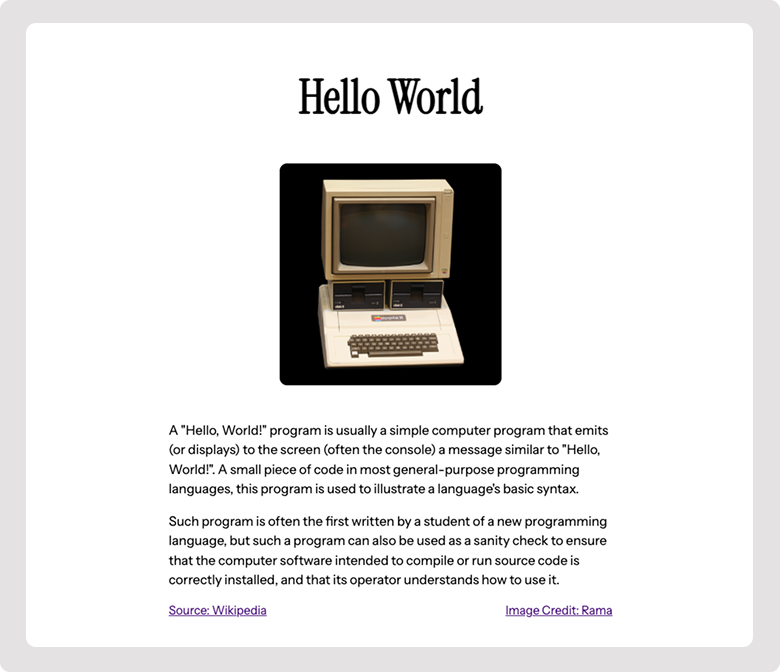
By the end, you’ll be able to create a webpage that looks like this:
##Introduction
HTML is an easy language to learn. HTML uses tags including opening tag < > and closing tags </ >. Note that the closing tag has a forward slash /. We wrap the content within these tags.
A very common tag is the heading level 1 tag or the <h1> tag. It is used like this:
<h1> Hello World </h1>Exercise
Are you ready to write your first line of html? The following box is where you can type some code.
In the code editor below, type Hello World between the opening <h1> and closing </h1> tags.
Congratulations! You have written your first line of HTML code.
Introduction
Every HTML file has a basic structure that includes the <html>, <head>, and <body> tags. Here’s the skeleton of an HTML document:
<!DOCTYPE html>
<html>
    <head>
    </head>
    <body>
      <h1>Hello World </h1>
    </body>
</html>- The
<!DOCTYPE html>declaration tells the browser that this is an HTML5 document. - The
<html>tag is the root element of the document. - The
<head>section contains metadata and links to external resources. - The
<body>section contains the visible content of the webpage. - The
<h1>tag (H one) is a heading element.
Setup
Inside the <head> section, we’ll add a title, meta information, and Google Fonts to make our webpage both functional and beautiful.
<head>
  <title>My Website</title>
  <meta charset="UTF-8" />
  <meta name="viewport" content="width=device-width, initial-scale=1.0" />
  <link rel="preconnect" href="https://fonts.googleapis.com" />
  <link rel="preconnect" href="https://fonts.gstatic.com" crossorigin />
  <link href="https://fonts.googleapis.com/css2?family=Instrument+Sans:ital,wght@0,400..700;1,400..700&family=Instrument+Serif:ital@0;1&display=swap" rel="stylesheet" />
</head>- Title: The
<title>tag sets the title of the webpage, which appears in the browser tab. - Meta Charset: The
<meta charset="UTF-8" />tag ensures that the browser can display special characters correctly. - Viewport Meta Tag: The
<meta name="viewport" ... />tag makes the webpage responsive on mobile devices. - Google Fonts: The three
<link>tags add fonts to our webpage. We’ll add Instrument Sans and Instrument Serif fonts.
This is what the file looks like with the structure and meta content.
Although we add the fonts to the file, we need to specify where we need to apply them. In the next step we’ll learn how to do just that.
Content and Style
Now, let’s add some content with styles. We’ll include a heading, two paragraphs, an image, and two links. We’ll use inline styles to style these elements and our new fonts.
Font
We can set the font using the style tag and specifying the font family like this.
<h1 style="font-family: 'Instrument Serif', serif;"> Hello World </h1>Make sure the punctuation is accurate. If you miss a quotation mark, a colon, or the semi-colon, things might not work.
Paragraphs
Use the <p> tag to add paragraphs. We’ll add styles to set the font family, font size, line height, and maximum width. We’ll use the sans-serif font for the p tags. The , sans-serif part is a fallback in case the font doesn’t load.
<p style="font-family: 'Instrument Sans', sans-serif; font-size: 1.2rem; line-height: 1.5;">
  A "Hello, World!" program is a simple computer program that displays a message similar to "Hello, World!". It is used to illustrate a language's basic syntax.
</p>
Exercise
Copy the following paragraph and paste it after the first <p> tag.
<p style="font-family: 'Instrument Sans', sans-serif; font-size: 1.2rem; line-height: 1.5;">
  A journey of a 1000 lines of code begins with a simple "Hello World".
</p>Images
The <img> tag is used to add images to your webpage.
Basic Image syntax
The <img> tag has three important attributes:
src: The source URL or path to your imagealt: Alternative text that describes the imagewidth: The width of the image in pixels
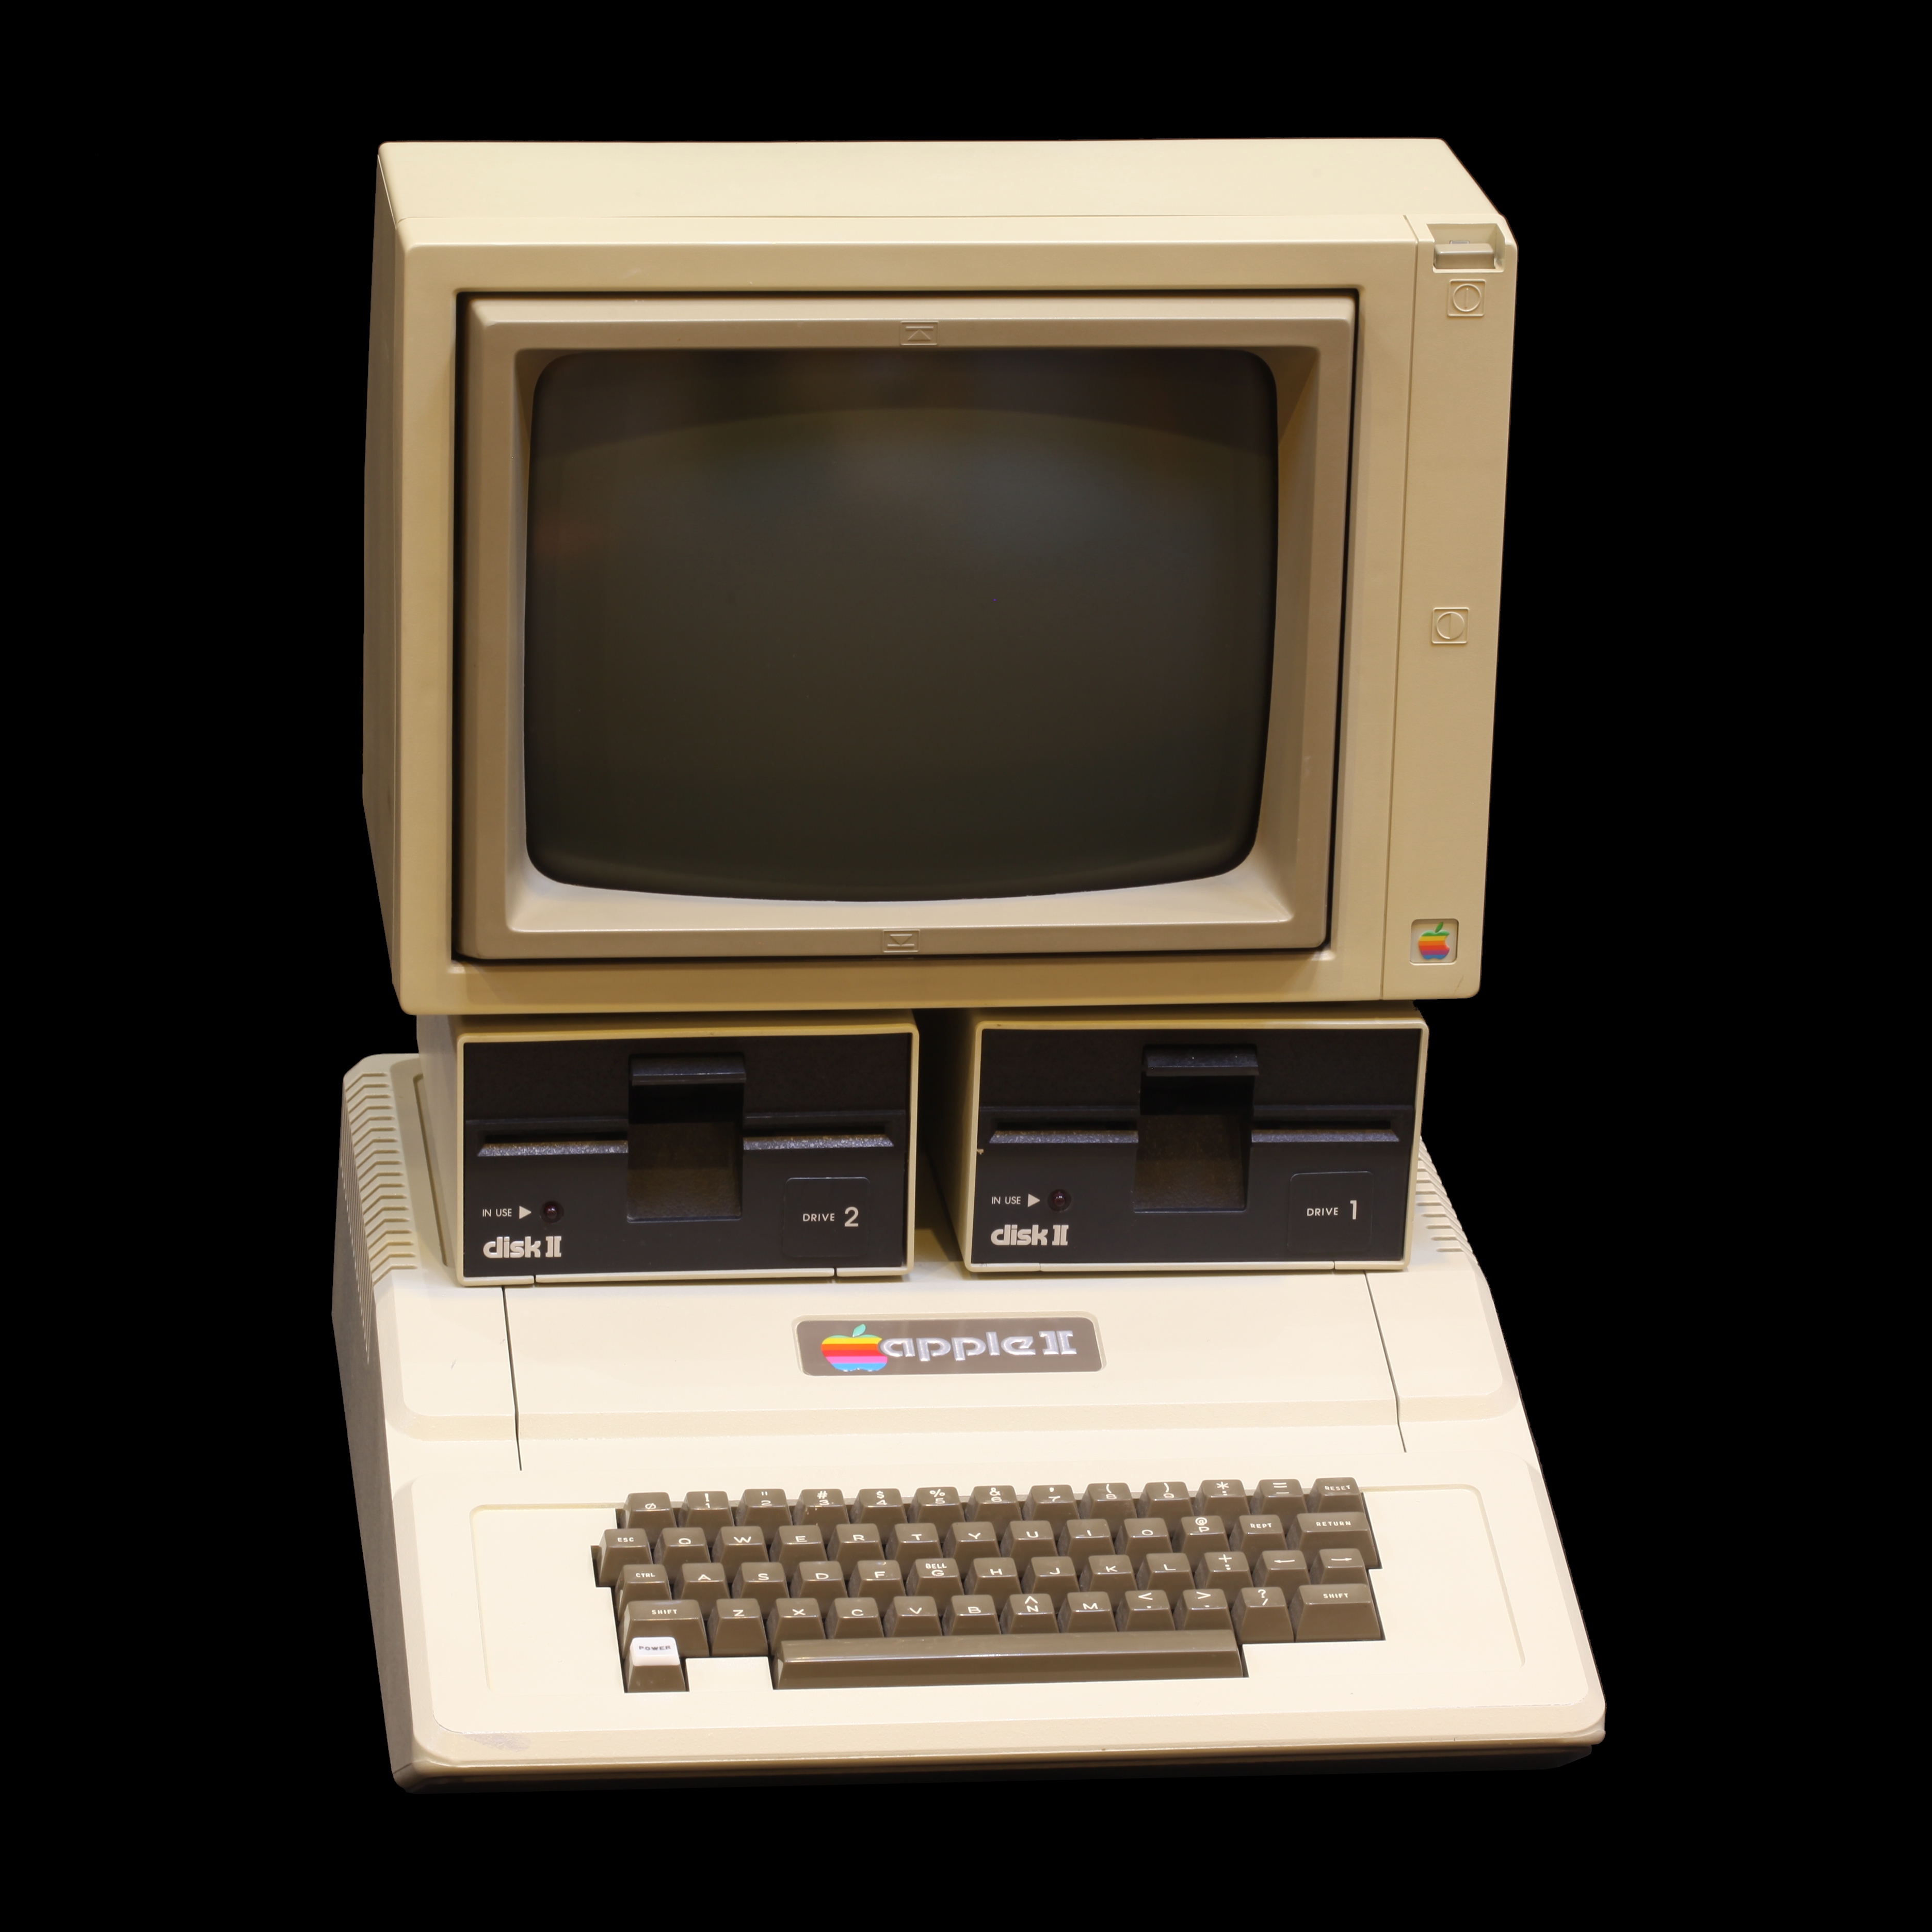
<img
  src="https://upload.wikimedia.org/wikipedia/commons/7/7e/Apple_II_IMG_4212.jpg"
  alt="Apple II computer. On display at the Musée Bolo, EPFL, Lausanne."
  width="300"
/>
Styling images
By default, images are inline elements, which means they flow with text. Often, we want them to be on their own line and have some spacing. To do this, we can use display: block in the style.
We’ll add margins to give some breathing room around the image. The margin tag can take multiple values. The first one specifies vertical margins and the second one specifies horizontal margings. If we set horizontal margins to auto the image will be horizontally centered on the page. To add rounded corners, we can use border-radius.
<img
  src="apple2.jpg"
  alt="An Apple II computer"
  width="300"
  style="
    display: block;       /* Makes the image appear on its own line */
    margin: 20px 0;       /* Adds vertical spacing */
    border-radius: 10px;  /* Rounds the corners */
  "
/>
Exercise
Change the width from 300 to 400. Remember to use quotations.
Links
Let’s add links styled with our custom font. The <a> tag takes in href attribute where we specify the url.
Like this:
<a href="https://en.wikipedia.org/wiki/HelloWorld"
   style="font-family: 'Instrument Sans', sans-serif; color: blue; display: block; margin: 10px 0;">
  Source: Wikipedia
</a>

<a href="https://en.wikipedia.org/wiki/Desktop_computer#/media/File:Apple_II_IMG_4212.jpg"
   style="font-family: 'Instrument Sans', sans-serif; color: blue; display: block; margin: 10px 0;">
  Image Credit: Rama
</a>
Exercise
Add a link to `https://computerhistory.org’ with the words “Computer History”
Align and Center
To make our page look more visually consistent, we’ll center the content and style our heading with the serif font:
<body style="max-width: 600px; margin: 0 auto; padding: 20px;">
  <h1 style="font-family: 'Instrument Serif', serif; font-size: 4rem; text-align: center;"
    >
      Hello World
    </h1>

    <img
      width="300"
      alt="Apple II computer. On display at the Musée Bolo, EPFL, Lausanne."
      src="https://upload.wikimedia.org/wikipedia/commons/7/7e/Apple_II_IMG_4212.jpg"
      style="display: block; border-radius: 10px; margin: 3rem auto;"
    />

    <p
      style="font-family: 'Instrument Sans', sans-serif; font-size: 1.2rem; line-height: 1.5;"
    >
      A "Hello, World!" program is usually a simple computer program that emits
      (or displays) to the screen (often the console) a message similar to
      "Hello, World!". A small piece of code in most general-purpose programming
      languages, this program is used to illustrate a language's basic syntax.
    </p>

    <p
      style="font-family: 'Instrument Sans', sans-serif; font-size: 1.2rem; line-height: 1.5;"
    >
      Such program is often the first written by a student of a new programming
      language, but such a program can also be used as a sanity check to ensure
      that the computer software intended to compile or run source code is
      correctly installed, and that its operator understands how to use it.
    </p>

    <a
      href="https://en.wikipedia.org/wiki/%22Hello,_World!%22_program"
      style="font-family: 'Instrument Sans', sans-serif; display: block; margin-bottom: 10px;"
    >
      Source: Wikipedia
    </a>

    <a
      href="https://en.wikipedia.org/wiki/Desktop_computer#/media/File:Apple_II_IMG_4212.jpg"
      style="font-family: 'Instrument Sans', sans-serif; display: block; margin-bottom: 10px;"
    >
      Image Credit: Rama
    </a>

  </body>
</html>
Publish
To publish your website, you can use a service like neocities.org where you can copy and paste your html file.
Go to neocities.org and sign up for free. Enter a username which will also become part of the published website address. Finish the sign up form. After signing in, you can click on Edit Site and replace the index.html file with your contents.
This site is published at https://appletwo.neocities.org/
Final Code
Here’s the complete HTML code with custom fonts and inline styles:
<!doctype html>
<html>
  <head>
    <title>Hello World</title>
    <meta charset="UTF-8" />
    <meta name="viewport" content="width=device-width, initial-scale=1.0" />
    <link rel="preconnect" href="https://fonts.googleapis.com" />
    <link rel="preconnect" href="https://fonts.gstatic.com" crossorigin />
    <link
      href="https://fonts.googleapis.com/css2?family=Instrument+Sans:ital,wght@0,400..700;1,400..700&family=Instrument+Serif:ital@0;1&display=swap"
      rel="stylesheet"
    />
  </head>
  <body style="max-width: 600px; margin: 0 auto; padding: 20px;">
    <h1
      style="font-family: 'Instrument Serif', serif; font-size: 4rem; text-align: center;"
    >
      Hello World
    </h1>

    <img
      width="300"
      alt="Apple II computer. On display at the Musée Bolo, EPFL, Lausanne."
      src="https://upload.wikimedia.org/wikipedia/commons/7/7e/Apple_II_IMG_4212.jpg"
      style="display: block; border-radius: 10px; margin: 3rem auto;"
    />

    <p
      style="font-family: 'Instrument Sans', sans-serif; font-size: 1.2rem; line-height: 1.5;"
    >
      A "Hello, World!" program is usually a simple computer program that emits
      (or displays) to the screen (often the console) a message similar to
      "Hello, World!". A small piece of code in most general-purpose programming
      languages, this program is used to illustrate a language's basic syntax.
    </p>

    <p
      style="font-family: 'Instrument Sans', sans-serif; font-size: 1.2rem; line-height: 1.5;"
    >
      Such program is often the first written by a student of a new programming
      language, but such a program can also be used as a sanity check to ensure
      that the computer software intended to compile or run source code is
      correctly installed, and that its operator understands how to use it.
    </p>

    <a
      href="https://en.wikipedia.org/wiki/%22Hello,_World!%22_program"
      style="font-family: 'Instrument Sans', sans-serif; display: block; margin-bottom: 10px;"
    >
      Source: Wikipedia
    </a>

    <a
      href="https://en.wikipedia.org/wiki/Desktop_computer#/media/File:Apple_II_IMG_4212.jpg"
      style="font-family: 'Instrument Sans', sans-serif; display: block; margin-bottom: 10px;"
    >
      Image Credit: Rama
    </a>

  </body>
</html>
And here is how it looks:
Conclusion
Congratulations! You’ve created a stylish webpage using HTML and custom styling.